Happy Spring! This month, we got inspired by all of the lovely flowers blooming all around the community and decided to create pretty paper flowers.
There are many, many ways to craft paper flowers. But we wanted to take advantage of the crimping function of the Tube-Wringer to create interesting, visible patterns. Below is a breakdown of what we created and how.
Spring Craft: Making Spring Flowers
What you will need:
– Heavy paper (watercolor paper or cardstock works great)
– Scissors
– Pencil
– Tube-Wringer
– Glue
– Watercolors and watercolor supplies
What to do:
1. Prepare your paper by cutting strips to the size of petals you want to create.
2. Draw a series of petals on your paper.
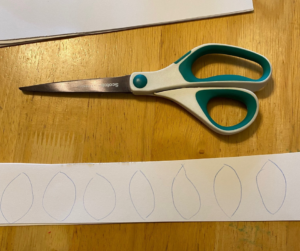
3. Cut out the petals.
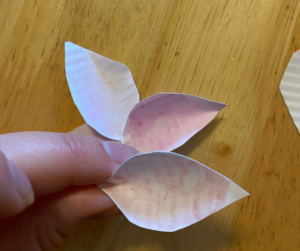
4. Crimp the petals with a Tube-Wringer
(I did this about five petals at a time, crimping up and down as well as side to side).
5. Paint the leaves with loose strokes using watercolors. Highlight the texture you created by letting the watercolors drip around the petals.
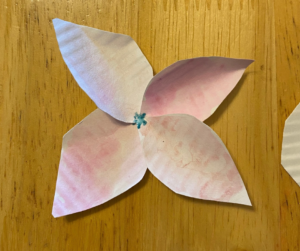
6. Once the petals are dry, arrange them in a flower.
7. Glue the petals together and allow them to dry.
8. Paint a pistil in the center of the flower to complete the look.
Now you have a pretty, eye-catching paper flower for your spring decorations! We will be creating several of these flowers to decorate baskets, paper chains, and more for the spring season.
This is a fun craft for those of you with children, and it’s also a nice way to bring flowers into the home if you have a pollen allergy.
Are you looking for a fantastic crafting tool? Be sure to get your Tube-Wringer here!